Dry Brush Effects in my Art Journal
 I have had the best weekend in ages. Free from blogs and internet, and filled with culture and my kind of City Adventures. I’ve been to an art museum, a classical concert, spent time with old and new friend talking about art and writing, had dinner with family, bought a new-to-me magazine on literature, been to the art store – and filling up the well of inspiration in general.
Now sipping a hot cup of coffee and looking through emails.
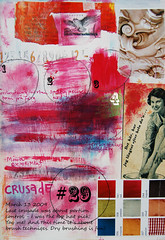
Also, I’ve been experimenting with the “dry brush” method for the crusade of March: Brush effects! It’s described in a great book about acrylic methods that I own, Acrylic Revolution (New Tricks and Techniques for Working with the World’s Most Versatile Medium) by Nancy Reyner that I own. It’s something you might have tried without thinking about it. Experimenting with it more deliberately has been most interesting!
This is what I found out;
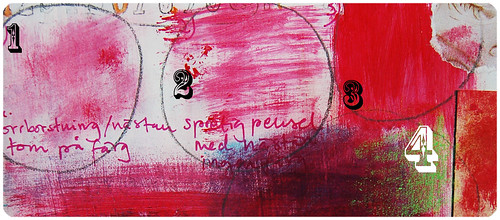
1. With almost no paint on the brush you can’t even stroke, you’ve got to push the dry brush down on the paper. This creates a cloud-like surface that I love. It’s dreamy. 2. You need a straggling (spretig) brush to “dry brush”. I’ve got a couple of old hard ones that are perfect. These are also the most beautiful ones in my “vase of brushes”. 3. With too much paint left on the brush you won’t get any fun results in “brush effects”. Then you’ll just be painting… hehe. If you want to dry brush your paper you should dip your brush into the paint and then wipe off excess on a paper towel! Make it dry, you know. 4. A layer-upon-layer surface is much easier to achieve if your brush is this dry, because you don’t have to wait for the paint layers to dry and it almost always leaves the surface underneath protruding in a layered way. Yummy surface!
And as you can see from all the 1-2-3-&-4 examples above painting on gesso gives even more texture.
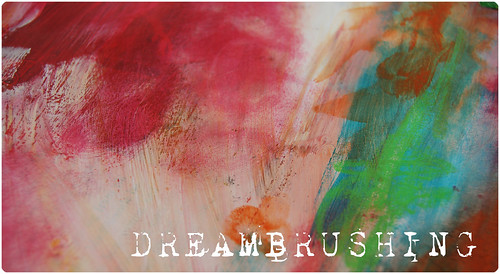
Dreambrushing is a new term I invented… It’s when you create that cloudy surface with a very dry brush kind of weighted down into the page from above. I ♥ this surface!
Dry brushing is very fun to do on top of your collaged art too. It adds a layered feeling without hiding your pretty ephemera and paper fodder in paint! Try it out! I also like to do this with crayons, just very lightly letting the crayon dance above the collage. I guess I really have been finding a voice in my art, but you just don’t notice until you take a step back to look. I see progress and it’s a nice feeling to notice this.
Another method that came to mind when I read that Michelle drips paint from a watery brush to her page, was the Edge Spatter Technique (another name invented by me) that I love. 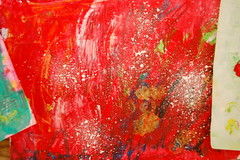 That’s when you want to drip thick paint that just wont drip. Fill your paintbrush with paint and “spatter” it against the edge of a lid or your palette (my acrylic palette is a big plastic lid with half an inch edges) so that the paint will spatter onto your paper! This creates such cool raised dots! See this example from summer’s best outdoor smear, paint and spill session! :-)
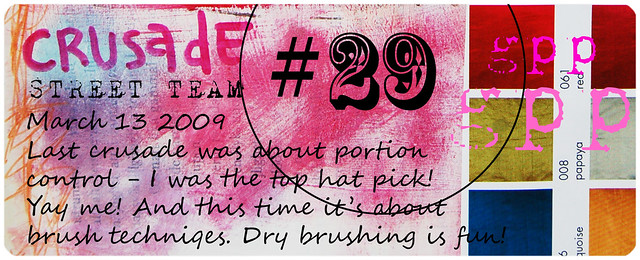
 This post is a contribution to Crusade #29 Brush effects that is all about “dry brush, dirty brush and monoprinting”. In the art store I got myself a brayer, finally! So after some monoprinting that’s what’s next in iHanna on the floor studio to experiment with!
♥ Inspiration that sparkles elsewhere…
♥ I could just stay here by the computer too. Sit with laptop in my knee making Photoshop brushes all day long. I haven’t even tried yet, I don’t know if I should… I think there is an(other) addiction coming on when I see Michelle Ward’s yummy tutorial! ![]()
♥ Extra link inspiration; 365 Picture Prompts – a daily prompt that launched March 15 at Creativity Portal. It doesn’t have a rss feed unfortunately, but I think it’s worth bookmarking and coming back to!
Discover more from iHannas Blog
Subscribe to get the latest posts sent to your email.


DREAM BRUSHING!!!!!!
Excellent colors as usual, Hanna….you’re 100% correct in calling it dream brushing!
Julie, thanks! I think it’s a pretty name that suits the effect it makes – both on the page and my mind when looking at it… :-) Love the dreamy treas you photographed in Wonderland too!
Hanna – it’s always a delight to come here – you are so full of enthusiasm and your colors cheer me right up. Fabulous brushy things going on here! Thanks for sharing withe team. You reminded me about the brayer – going to get mine out today!
Michelle, I would love to see what you do with your brayer and get additional inspiration on this crusade. I haven’t tried mine yet, I need to spread out some newspaper and just DO IT! :-) Thanks again for a great crusade! Now visiting the rest of the team members.
That dream brushing shot is just yummy! Dreamy! Love it and love the name!
A WEALTH of great inspiration here! I’ve enjoyed all your links to previous posts too…thanks!
I have so many old Indian blocks that I’ve never found a good way to use to print….I’m going to do a rubbing with them, just never thought of this before!!
Carmen,
thanks for the comment! Maybe dreambrushing is something I’ll be famous for?
Shephanie!
Thanks for visiting right back and doing the crusade! I don’t know what “indian block” is? but if you mean wax rubbings I guess it’s something that has structure? It was a fun crusade that one too! :-) Let me know if you post about it, I’d love to see it!
Oooo some lovely brushing going on here, Hanna ! As always, your colors make me happy too ! Love the dreambrushing !
Happy printing !
Beautiful !!
Especially the Edge Spatter Technique , so cool !!
(hmm…like the name of dreambrushing too )
Hanna, it’s a delight to learn your new terms for things, and you can bet I’ll be doing some dream brushing! I love to spatter paint, too! I love it when it’s so wet, and you spatter and also drip at the same time, and it runs down the canvas!! What is that!? Edge Spatter!!
Love your colors. What are you doing for Easter?!
Hi Hannah, As usual, a wonderful and inspiring post. I love your bright colors and the fact you can still see what is underneath.
We did a project with our kids at church and used toothbrushes for spatter paint. The kids loved it and there were some interesting effects.
Thanks again Hannah.
Jo
Great stuff Hannah! I must try the dry brushing over a journal page of collaged papers now! Fabulous!
Your dream brushing textures and colors remind me of Chagall. Oh so dreamy!
{soul hugs}
kathryn
Wow, the dreambrushing looks really beautiful, I’ll have to try that!
Fantastic! Love your drybrushing and especially the “dream brushing.” Also think the page absolutely rocks. Thanks for reminding me of the EDGE….. forgot all about it!
Gorgeous, Hanna, wish I had the patients to try… Very inspiring, indeed.
Hi Hanna,
wow you had a GREAT weekend. ANd made such WONDERFULL pages….Dream brushing is going to be added to my art & crafting vocabulary! Hedwig
Dreambrushing is lovely! You’ve inspired me to take out my paints and brushes now that I completed all my swaps.
*hugs*
Sophie
oo, dream brushing!! love that! and it’s perfect for the CED theme this month!! Can you describe the process more? I wasn’t sure what you meant.
Great colors in your pieces, and great information. I really enjoyed your insight to the challenge.
Great post as always Hanna. I’m glad you enjoyed some time out away from blogging and computers. Very interesting information on dry brush technique too.
Hanna those splatters on red are delicious. And love your new words! Thanks for sharing them with us.
This is just faboo — too, too fabulous! I love all the textures and interplay of color. And I love “dreambrushing,” a great neologism!
I wish you fun with your brayer. Mine is one of my top three art tools, ranking just after my brushes and paints. I especially love to use it with recently used stencils — talk about cool monoprints using negative space. Happy experimenting!
I love what you do with these pages (dream brushing!!!!!), and I love what you do with your pages in Photoshop. A pleasure to look at.
Your colors are so sweet & happy. It’s been a treat visiting today. ;)