How to make your own Planner
After the introduction to the why of my DIY planner I thought I’d continue today with the how to, a tutorial to inspire you and some facts on how I finally created my own Planner for 2011, in a format that I can continue to use for many years to come! I created the layout of the weekly pages in Adobe InDesign, as well as a few other layouts for my planner, but I won’t go into that here.
Most recent update: Get iHanna’s Planner Pages here
Tutorial time!
Since I have been thinking about this projects for months I knew what I wanted to end up with (finally!). You might have other prerequisites for your planner project, so go ahead and be inspired but make sure you get what you want from your personalized planner! This is what I wanted from my project;
My DIY Personal Planner need:
- to be small enough to fit into my bag, but big enough to write a few things each day 7 days a week
… this is why I decided on a non-standard size (see previous post about how size does matter) - to have spine that I can open up, so that I can take out pages and add more as I go
- to use my own printable pages for calendar pages (and other “extra” pages for lists, planning etc) that will fit my custom sized planner
- tabs for the different areas (because I adore tabs)
- a pretty cover that makes me happy
- constant reminders, printed each day of the week, of what is important to me to keep me accountable and on track
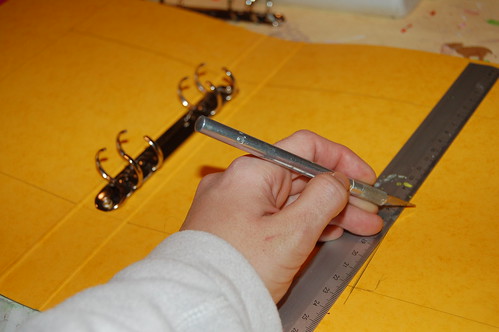
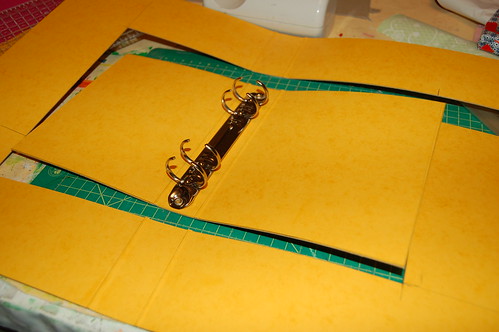
For the cover I bought a a plain yellow binder (with a cardboard cover) at the thrift shop. It has a European standard 2-ring mechanism (which is perfect for me because I’m Swedish and already own a hole punch for this kind of binder). You have to decide what will work for you. I decided to recycle it by cutting it down to a manageable size that fit the calendar pages I created using InDesign.
Finished cover size is 5.7 x 6.7 inches (14,5 x 17 centimeters), and the spine is as thick as 3,4 centimeters.
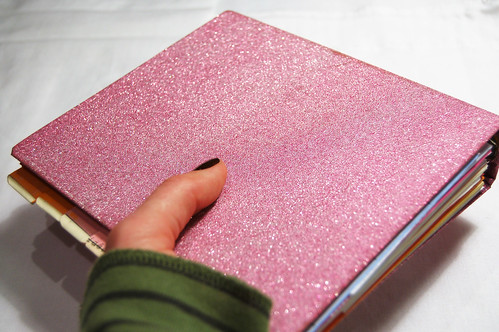
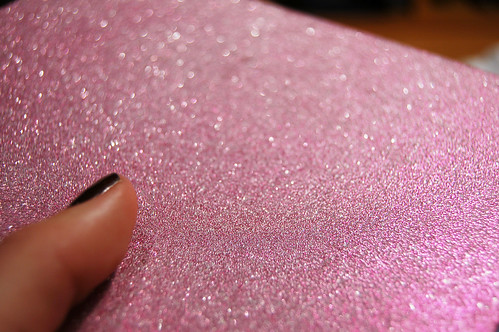
When I felt this size was really working for me I decided to make a pretty and durable cover for it too. I wanted to cover it with something durable and when I (in my stash of papers) found a kind of plastic book paper I knew it was perfect. It is pink and oh so sparkly! Just look at it;
I like that it is made out of plastic, because it will go into my bag on a daily basis and therefore get a lot of wear and tear. Plain paper would stain and tear much quicker, though I would guess that this one will not last long either (it’s already got a stain). But then I get to re-pimp it and that will be fun too! :-)

The inside endpapers are made from a photocopy filled with roses, from a few years ago when I had access to a great laser printer. I use a glue stick to attach everything, then I’ve also added a transparent plastic pocket to the inside of the cover. I am a firm believer that all journals, notebooks etc needs an inner pocket of some kind! Where else will you put business cards and daily ephemera that you want to save?
On each of the dividers I’ve taped a pretty postcard from my stash. The first one in the book is a Papaya postcard with the words Make a Wish!. Love it!
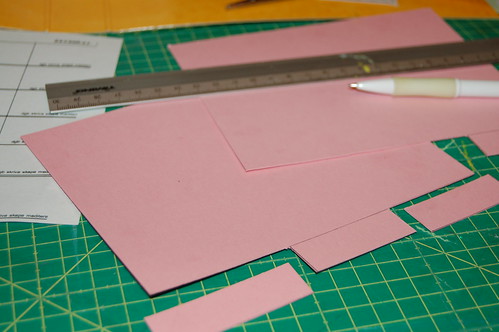
I used coloured cardstock to make a few section dividers. I cut out the pages and measured and marked tabs that would not overlap each other. At first I had no idea what sections I wanted or would find useful, but I created a few anyway just to get started. I have sections for Blog planning, Writing, Read Books etc. Make sections that feels usable for you. I printed labels and used transparent book tape to seal the tabs that stick out from the normal pages, for easy browsing.
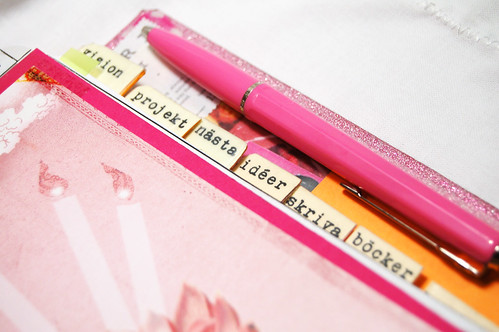
These are the tabs I’ve got in my planner for now;
Then it’s time to print the pages for your planner!
When you’ve got a few pages printed it’s time to down size them and start assembling it into your planner.
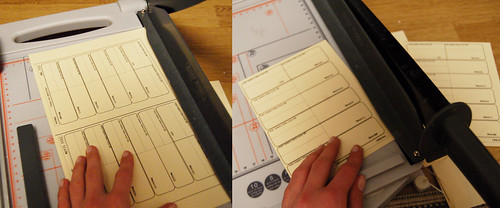
I’ve bought beautifully cream coloured paper at the office supplies store! Two weeks fit into one page and I use my paper cutter to cut them apart. Chop chop, and finished!
Check out the wonderful site diy planner if you can’t or don’t want to create your own layouts… They’ve got yearly templates that you can print – for free!

I customize the weekly overview on the computer by adding the name of the month and a little quote, but then I write dates and week number by hand. It’s just faster and also more personal & fun.
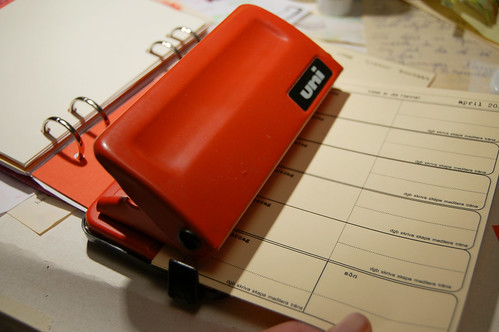
Then punch holes in each page. BTW, did you know that you can buy a special Filofax hole punch? I didn’t know this when I started to make my planner folder, but I think it’s quite generous of them to make one. Imagine the possibilities… You could add anything to your beloved filofax… If you just wanted to make the pages and not bother with a cover you could get a filofax cover and use that to store your personalized pages. Just a thought…
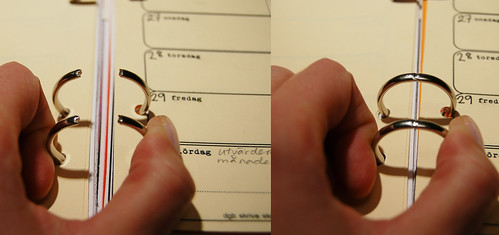
I like the standard Swedish folder style though, with four holes. I’m thinking that I will also create another folder where I can put used weekly pages, like an archive folder! We’ll see.
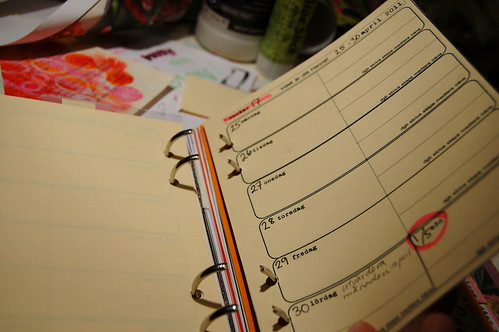
Then just sort the pages and add them into the ringbinder! And start planning your days, weeks and months. Your life!
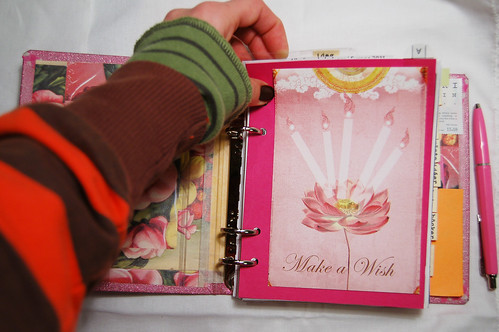
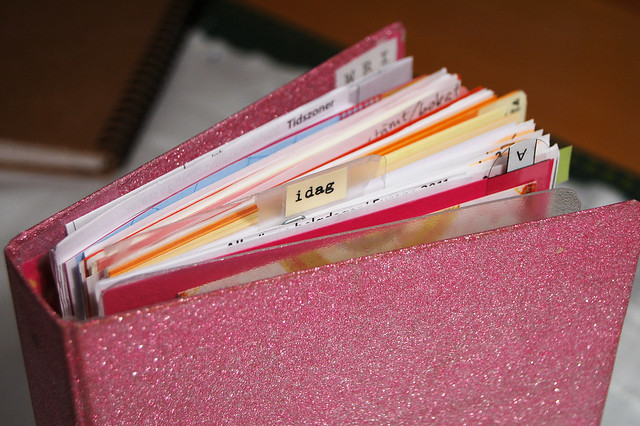
One of my favorite parts of this planner is the Today tab that is sticking up on top of the planner. It tells me where to find this week that we’re in right now, and I use it all the time to check what time my Next Thing is!
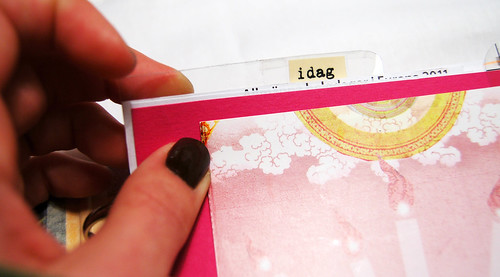
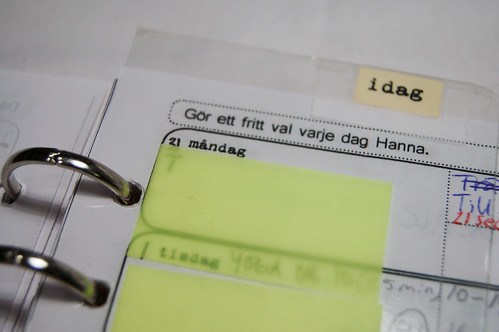
I made it out of empty plastic laminate and taped the word idag (today) there.
I’ve been playing a bit in inDesign now that the size is set it’s easy to customize pages for special use in my planner. These are a few of my layouts;
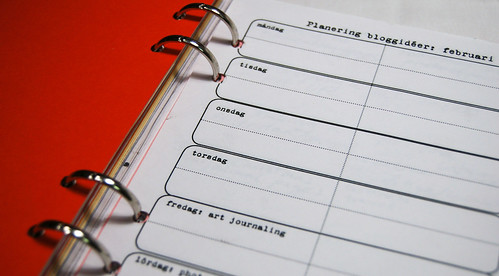
Plan blog posts ahead of time like we learned from Pam’s post on planning blog posts for a year. I am a bad planner, but I have ambitions… does count for something me thinks!

I’ve also created a layout for Projects that are in the planning stages. I want to outline the idea, make some notes below that and then make a list of Next Actions in true GTD-style!
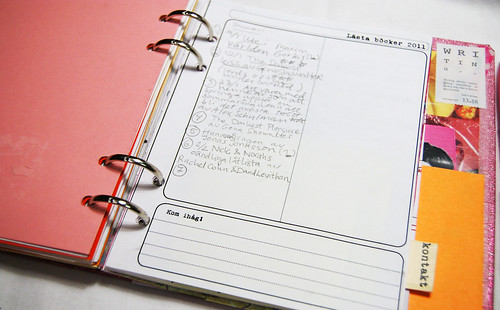
I even created a special page for Books I’ve Read this year! I’m oh so into novels right now, I just want to read all the time. I’m keeping a list of Books to read here too, for the first time in a long time. Sometimes when I start thinking about books I want to read there are so many that I get overwhelmed, but this time around it is helping me focus on what I really want to read, like my friend Maria’s favorite books from 2010!
The dividers has pretty postcards, like I mentioned. Here are a few more;
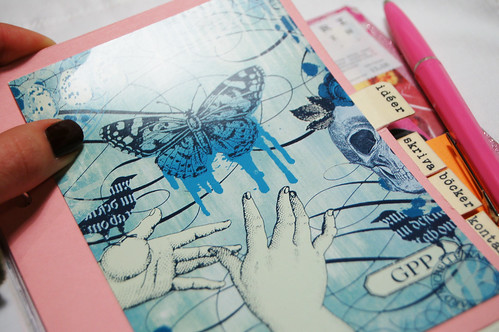
Love this design too, a Michelle Ward designed GPP postcard.
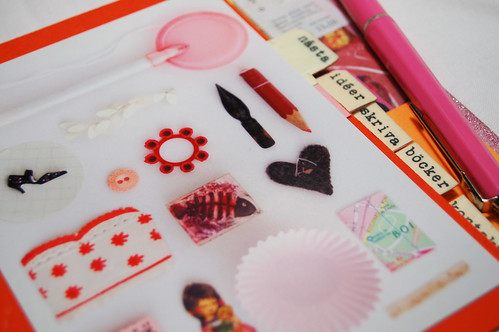
Pretty collection of pink things, a postcard designed by Christine Clemmensen.
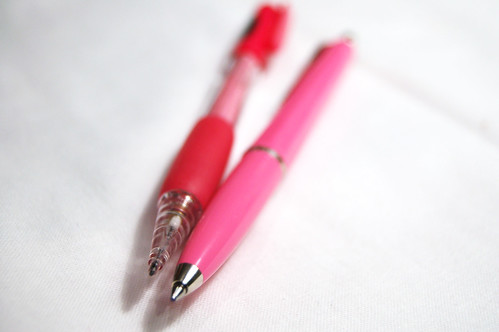
To celebrate my pink planner I bought pink matching pens. All of a sudden I’m obsessed with pink pens, I’m thinking these two are the beginning of a great collection…
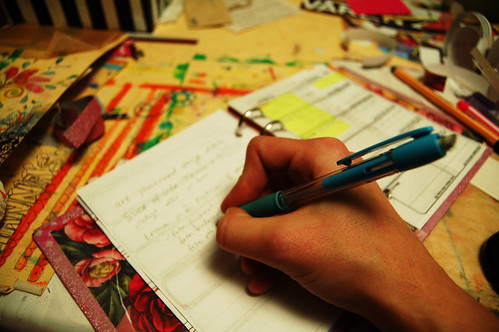
I love using my planner! Love love love it! Another favorite use is the to-do-lists I keep on the opposite page of the week. So handy and useful there!
I hope you’re inspired to make something on your own. Let me know if you make a planner and what works for you!
Update: Get the scope on the new year of Planner Pages here. Please subscribe to iHanna’s newsletter to be notified when new editions come out, and when I start up the DIY Postcard Swap next time.
Discover more from iHannas Blog
Subscribe to get the latest posts sent to your email.


So pretty! I have been making my own planner for years, but mine are not as pretty as this one! I love the pretty dividers.
I have a trick that may help your left-handed readers. I am left-handed, and discovered that turning the notebook upside down and backward (with the center of the notebook on my right side) before adding pages works SO much better.
This is so great, Hanna! Beautiful and functional at the same time, with yummy bits like postcards. Terrific.
Me like! :-)
Your planner is fabulous! I seem to be hopelessly disorganised this year so far and I’ve had oodles of ideas that I just keep forgetting to write down (and then I forget them – eek!) so perhaps a planner is just what I need! Thanks for the inspiration as always!
Hi Hanna
Thanks for visiting my blog and leaving lovely comments
I love the idea of making your own planner. This would be good to organise all my ideas, right now they are on all sorts of bits of paper floating around the house – not good if you want to find them in a hurry. I have In Design but I don’t use it often enough, so this will be good practice. Thanks for your step by step photos.
Lee:)
wow! i love this and the idea that i could somehow finally get organized. i will have to make one for myself. thanks for the instructions.
J’adore! You are a girl after my own heart. I love planners but designing your own is brilliant. Thanks for the inspiration.
Love the pink glitter and the yummy pink pens! So bright and happy! Definitely going on my crafty to-do list! Thanks, Hanna!
Love your binder, if you want more possibilities you can buy binder mechanisms and binder board at Sl?jd-detaljer. I have done a lot of binders, here is an example on how I do them, this one is not decorated at all.
I love your cover! Thanks for sharing. I love planner and the more personalized the better!
I love, love, love this!! What a great idea. Adding it to my list…
Lovely planner! And especially I love the idea of using a ready folder and cut it down to proper size. Well done!
Thanks everyone for your lovely comments! Let me know if you make a planner on your own, I’d love to see!
Karin, tack f�r l�nken! Din p�rm �r superfin! Jag har faktiskt k�pt en monterbar p�rm-mitt, p� Svanstr�ms, men inte hunnit anv�nda den �nnu. Funderar p� att montera den i en bokp�rm fr�n loppis! N�gon g�ng… :-)
Great tutorial, Hanna. I’ll bet that you’ll be drawn to use it because it’s pretty and pink.
Beautiful !!
I like the planner you customise for yourself.
What’s the programm that you use to do those layouts and what is the name of the font you are using on them? By the way, LOVING YOUR PLANNER!
This planner is gorgeous! I love how you’ve customized it so completely! This post really inspires me to get organized and make myself a planner like this, even if my schedule isn’t really interesting enough to really need a planner.
Hanna, I can not thank you enough for making this tutorial! I have so many things going on in my life (like keeping track of my eight (yes, eight!) doctors and appointments), that trying to fit everything onto my wall calendar is just too hard. I’ll be working on my worn planner now, soon, as soon as I can get some materials together. You make it all sound so easy, and I believe I can do this, too! And I have no talent at DIY stuff at all.
Thank you again, a million times over!
Nanna, as I mention in the post I’ve used InDesign for the layout. I’ve used several fonts in this project, the one on the tabs a typewriter font called VTPortableRemington, I love typewriter fonts!
Wow. What a great idea to make your own planner. I always try to find what I want and never seem to find Exactly what I have in mind. This is an idea to keep in the back of my mind to do for 2012. Thanks for sharing.
Hannah, this is just fabulous! So much more fun than my boring dayplanner. Ugh! Thanks for the great tutorial and links.
Really good details and great and great photos. I especially love the level of customization.
I really enjoyed this post, and am loving the idea of making my own planner.
Love this. I have to ask–where did you get that plastic paper? It’s awesome.
Gorgeous! I’m such an organising nerd, and I don’t want to override the diary my best friend bought me for Christmas but it will probably take me another 10 months to get around to making a planner – perfect timing :P
Oh wow – this is fantastic! All these years I’ve been searching for the “right” daily organiser/filofax, and I could have been making it for myself all along. TFS this incredibly clever idea!
Helen — Firenze Cards
Gorgeous! I think I need one of those, big time.
That is so lovely! I think I need to do some Filofax-improving soon… I like mine but I think I could like it more! Which might magically make me use it, too.
S� himla snyggt och inspirerande!
Great tutorial! I posted a link to your blog from mine! I write a weekly blog about getting organized and thought this tutorial was perfect for it! Thanks for sharing!
I am your newest follower and I absolutely love this. You are so creative. I would have never thought of this. Thank you so much for sharing! I would be honored if you would link up your super cute blog over on my blog stalkin’ page.
This is seriously fantastic!! Great job. :)
ps. you should offer your templates as downloads, they’d be a hit!!
This is a beautiful project! May I ask what paper cutter you have? It looks very good – I just bought one on Amazon that I’m less than thrilled with.
Thanks for coming by and commenting!
Amanda! I will give it some thought about doing templates, though mine are in Swedish and I would need to tweak them a bit to publish them on my blog. :-)
Rose, thanks for your comment too!
I’m Swedish so the paper cutter I bought is from a Swedish shop. The brand is called Peach and I’m not sure you could find it where you are… I think it’s something you want to buy from a real store to see and test it out a bit maybe.
SO SO pretty! And practical too- my favorite combo. ;)
This is SOOO incredible. I am inspired and in LOVE. I do have some questions though. What program did you use to create your templates? Also, how difficult was the template making process. I, like you, know exactly the design and layout i want my planner to be but am not always good at creating these on the computer. Do you happen to have your templates as download links? THanks so much!
Hi Kara, glad you like my planner. Thank you!
As mentioned in this post I use InDesign for the design of the pages, and I do think you need to know a bit about it to use it, but you can always learn if you want to! I did. To me the process of making templates wasn’t easy, but I’ve used this program for a few year now.
My own pages are in Swedish and not downloadable right now, maybe next year I’ll create something to share. Good luck!
TRULY INSPIRATIONAL!!! I’ve been searching for some inspiration for creating my own planner.. and I found it here! Thanks so much!! I’ll be blogging about this on my blog this week. :)
Loved the glittericious pink planner. I have tons of scrapbooking scraps that I feel would look great on a planner of my own but was not brave enough to venture to do this work! Thanks for posting! You make it look so easy!!!! :-)
Hi,
I was wondering where you got the ring binder spine. I have been looking everywhere online and I can’t seem to find one that is 8.5 inches. Thanks for the tutorial! It is truly inspirational especially for someone heading off to college like me. I was looking for a planner online that would fit my needs and couldn’t find one that was in my price range or had all of the things I need to keep organized. Thanks again!
Dia, thanks for your kind words! I’m not sure you’ll need a binder that is that exact size – but maybe try amazon.com they have lots of options there! I’d get something like their Recycled Chipboard Binder and start with that. It is 12 x 5 x 12 inches, and if you want it a bit smaller you could cut it to size like I did. Have fun!
hi hanna.your tutorial has been really helpful for me.student life can be quite demanding if u dont organize your schedule and i’ve only use a normal notebook since the cost of buying the planner is quite expensive.now i can do one for myself.thanks a bunch.lots of love from malaysia. :)
Eyda, thanks for leaving a comment. I too think planners are expensive, but be aware that it takes quite a lot of time to make your own too, and being a student is time consuming. Let me know if you make one, I’d love to see it!
thank you much for the inspiration! :D
here is my planner on facebook
Thank you for sharing your planner, how fun to see all those great planner images, nice work! I spot some templates by Amanda in there too.
yes, they are Amanda’s :)
I made some aswell because I need some she didn’t have
I love your planner! I have been wanting to do this for years, but never got to it, and seeing this sparked my interest once again! I have a question though: Where did you find a binder with such small rings?
Ashleigh, thanks. I’d love to see your planner when it’s finished. The binder rings are normal European size for a 2-ring binder. I started with a A4-size that I cut down to a more manageable size. Maybe something like this would work?
Wow! Great post, you`ve really inspired me to do my own personalized planner, thank you! :) I`ve just found your blog,but I`m defnitelly going to read it from now on… all the best!
This is amazing & truly inspiring! I have been searching for a good planner and you have definitely encouraged me to make my own! Yours is great! One question though, how did you attach the silver hole punch thing (sorry not sure the exact name) into the inside of the folder? I think you said you just bought a plain cardboard folder so how did you Attach the 4 rings? Or if its a binder how did you cut it?Thanks!
Thanks Mands for commenting.
The ring binder mechanism was already in the folder, it’s a ring binder folder or what ever it’s called. You also have the option of buying a ring separately in a well stocked office supply store – and attaching it yourself, but then I guess you’d need tools. The cover is cardstock so it was easy to cut through with a craft knife. Let me know what you make! :-)
Great! Thanks so much for responding and I will def keep an eye out for that. Again, such a wonderful job! I plan to keep looking out for more of your creations!
That planner is so cute im gonna try to make my own!!!!
i’ve been looking for a planner that calls out to me and has everything i need: a weekly/monthly view, 2-page weeks, just space to write with no lines on each individual day, weeks that start on Monday and don’t make my weekends smaller, space for weekly notes, a page at the end/beginning of each month for notes, etc. i haven’t been able to find one that fits my ever need because i’m picky (plus, i’m very artsy and would love for that to be portrayed on every monthly overview) and it never occurred to me that i could just MAKE one.
thank you so much; you are a lifesaver!
Hey Hanna! Just want to show you how much you inspire me. Click on over to my blog and see my reference to your page and my new art journal cover!!
Thanks for being such an inspiration!!!
Not to be rude or anything, but why not buy a binder instead if doing the extra work?
Alyssa, I understand it’s not for everyone, hehe. But I did my planner for the same reason I make collages, and a skirt, and knit my own scarfs, and paint my furniture and write blog posts and take photos. I love to create! How about you?
Ya. I like to create. I’m an amazing drawer, ( I draw anime), I love to sew :) ive made a bunch of bags, I used to knit, and I’m really good with technology. My tech Ed teacher was so impress by how much I know.
Hanna, I was doing some research about diy planners and I found yours… I love it!!!!! Thanks for the tutorial, that’s exactly what I needed to make my 2012 planner/organizer. I can’t wait to see what it will look like.
This is by far one of the best tutorials that I have seen to date. I’d go as far as to say… I love you for posting this!! Haha!
What a beautiful idea! I have a small black notebook that I would love to turn into a planner by covering the outside with some pretty fabric, however I’m not very crafty….=/ You did an amazing job! What a gorgeous planner!
Unfortunately I don’t really need a planner.
But… now I really WANT one. :-)
Happy new year from Denmark,
//Lisbet
Fab tutorial – thank you! My planner this year is a blank notebook that I’ve written the dates in, so that I can keep the back free for the dozens of lists that stitch my life together! – it’s awaiting a funky cover though, and it doesn’t feel so good using it before it’s properly ‘finished’.
i have just written a blog post about how fussy i am about diaries- but this is seriously amazing!
i was given an amazing diary for christmas, but now i’m already excited for next year- i can already see myself planning something like this, oops!
skye x
I just posted a link to this blog post on my blog….I LOVE this tutorial! :)
beautiful planner! I did one for me too! Would you like see it?
Hi Hanna,
I was wondering where you found that plastic glitter cover? Do you know where I can find something similar? I really want to make something similar to yours because it looks so great!
Eva
Eva, sorry, I have no idea where you can get that kind of paper. But any paper will look great, and you can add some glitter yourself with a glitter glue. Good luck.
You can buy glitter spray paint lots of places. It might even be easier to put on than glitter paper. :)
Thanks for the great idea. I was able to find the glitter paper at a craft store called AC Moore here in the US.
Hi, Hanna: I am making my own planner for 2012. I’m going with a one-page-per-day format, in InDesign. Do you have any idea how I could generate the dates automatically, without having to hand write them in?
I’ve been searching all over the Internet, and even visited the DIY Planner site, but am having no luck.
Thank you!
Sandra, good luck with your calendar. I don’t think there is a date function in InDesign. The quickest way would be to make a week and then print them and number the pages by hand, that’s what I did with mine. :-)
If you don’t want to hand write them, a date stamper would be the quick and easy way to go, just rolling it around to the next date, like the library uses.
Your planner idea is awesome and very very pretty I have been wanting one for ages but I wanted A personal one and gave up trying to make one as it didn�t look right once I had finished but you have really inspired me to make my own! have you ever considered making a business out of this as i think people would love it !!! Thank-you for the help and inspiration !!
Hey Hanna,
I love your planner! its is sooo pretty! I;m trying to make one of my own, but i cant seem to find any GOOD templates.. any ideas> i checked office.microsoft.com && DIY planners…. i dont really understand the InDesign…
Hey, I was wondering where you found the winking lady photo that’s featured in one of your pictures? It’s super cute and I’d really like to include in my own templates if possible. :)
Hi Eva, No idea where I found her, but there is a lot of free images online, I bet you can find something similar. Search for vintage illlustrations etc.
hyeee! i’m from malaysia and i just found your tutorial on making our own planner. actually i’m looking at shop but not one suit with my taste…then i google and found yours…love your tutorial and it give me some ideas to do my own…thanks yaaa!
this is beautiful and brilliant! <3
i've just gotten into planners, this is so inspiring!
That is awesome. LOVE IT. I totally understand the need to make your own. I bought a planner last year, fell in love with it, went to buy it again this year, THEY DON’T MAKE IT! Just aweful. And I can’t find one like I want, like you, that I can carry around in my purse. You have given me some fabulous ideas and I will have to see what I can create in InDesign for myself. Have a fabulous day.
I adore the planner and I’m going to start on mine tomorrow (as I am finishing my cross-stitch project) but I was wondering what the exact name of your weekly pages were on the DIY Planner website? I couldn’t find them. :(
2nd to what Katherine says. Love love love your sparkly pink planner! But where on the DIY Planner site did you get your pages? I’ve been looking for perfect planner pages for a while and I think yours are the ones for me but I can’t find them. Thanks!!
Amy, thanks for leaving a comment on my blog! The pages I’m using are made by me for personal use at first. Then I was planning to release my own pages for sale via my blog, but haven’t done so yet. Let me know if you would be interested in purchasing my designed pages as a printable download. :-)
Hi. I LOVE this tutorial. I’m going to college soon and i can’t wait to make a planner (: Do you know if they sell binders the size of your finished binder? I think it would be easier to buy a small binder instead of cutting a regular size one. Thanks for the tutorial (:
Hi Hanna I was wondering what size binder you used for the planner BTW I love to read books I read 8 books last summer
Hailey and Marina,
it is easier to buy a finished calendar or a binder in the right size if you can find it, I couldn’t so I made one – maybe that is not for you guys. :-)
Ok, now I’m inspired! I can never find a planner that fits just right for me. Thanks for the inspiration!
Hi Hanna,
This is the first time I’m doing a planner. So how do you make the tabs not overlap each other? What is the measurement for each one? Thank u and I luv ur planner! It’s do pretty in pink. :)
Gina, you could attach loose tabs one by one. If you start with the top one you will know where to add the next one “below it” on the next tab page. Good luck.
Dear Hanna,
I love your planner. You did an amazing job at making it. I have been searching online for a long time trying to find templates, ideas, tutorials etc. on them. I was wondering what all the tabs on your planner say? Thanks
Thanks Amy,
the tabs are vision, projects, next (thing to do), ideas, writing and books (what I’m reading).
Hi Hannah….
I linked through Pinterest to this old post of yours. I love what you have done with a DIY planner! I wonder if you ever posted your actual pages for sale? If so, where could I find them?
Hope you are well.
Becky
dear hanna,
im creating my own planner as well, but i have no idea on what to actually put in it? :L xxxx
I really like your planner. I cant find the pages that you used. I really like them! Cant find them anywhere! Could you be able to post them as a PDF? I love your work!
I agree though:)
I LOVED IT! is there anyother way to make a simple,cute,AWESOME planner?
um….NO! my friends and family love my planner thanks to…(drum roll)…YOU!
Thank you so much i can’t belive it:)
love,
ninaisnotmyname
Pink, pink, pink and…sparkly, sparkly, sparkly! What is not to like about this delish planner? Great job!
Hi Hanna,
I love your idea! I’m making my own planner now, but I have a feeling yours is much much better…! I’m having lots of fun, but I couldn’t find any templates that work for me in the Internet, so I’m making my own using Microsoft Office Word.
I have one question: What is this plastic sparkly pink cover you used to cover your planner??
Thnx!
Sonia. :)
Hi Sonia, so happy you’re making your own planner! I think yours will be awesome too.
Sorry: Can’t say anything about the pink paper though, don’t remember where I got it here in Sweden. I think you will find some kind of cover that makes you happy too. Think: plastic vinyl, fabric, scrapbook paper, glitter glue… Anything is possible and the best thing is that you can change it when you get tired of it! :-)
I love your binder. I live in the U.S. and all the binders I’ve seen have the metal strip all the way down the entire spine. Where did you buy yours? I’d be willing to pay to have it shipped to the U.S. if I can’t find anything here.
Jenn, do a search in a second hand store or at amazon, there are sooo many alternatives on what you can use! Try finding a organizer planner binder that is already small or this kind of check binder thing– it has a shorter spine.
I’ve also made my own ring binder. Good luck!
Hi, love this tut. I wanted to pin it on pinterest but it says “can’t pin this image”…
I’ll bookmark this instead, thanks.
Love this. It has inspired me to make my own. Still finishing it, but I am using the Circa system from Levenger. (Staples also has their own compatible brand). So far I have made dividers from some of my prettier scrapbook cardstock and working on a design for the weekly pages. When it’s finished maybe I’ll post it. Thank you for your inspiration.
Great idea and very helpful! Not only the look but also the content. You should also convert this a real iHanna one,- a smart phone app;)
hi, i love your planner very inspired i am making one this week
omg! thx hanna!!!! i will make one when i buy a binder! *hugs*
This is lovely to see. I’ve just ordered a half-price Moleskine diary because I like sticking old receipts in it. It’s a retrospective journal rather than a forward-planning diary.
This is beautiful and inspirational! Thank you! Now I’m gathering ideas for my own planner ;)
Wow this is actually amazing~!
You are great~!
I just saw this on Pinterest and was curious if your template is available for download yet? Its wonderful!
Hi!!
I spent 5 hours online last night looking for the perfect planner… �25 to start with then you’ve got to make it personal… Can’t afford that… Then I stumbled upon you and you fantastic tutorial!! WOW! I am going to utilize my day off tomorrow and make a planner… I’m soooooooooooooooo excited!!
Erm… If I use a regular cardboard ringbinder, will it be fairly easy to cut up? xx
Hi Lace, no bought planner will ever be as cool as the one you make yourself, or as useful to you! Cut into any ringbinder, it’s worth a try right? I hope yours turn out just the way you want it too!
Hi Hanna,
I love love love this post..and your whole site. Do you know where I can download the Swedish language calendar pages? I have been looking everywhere for an A5 planner page to print in Swedish language.
Thanks.